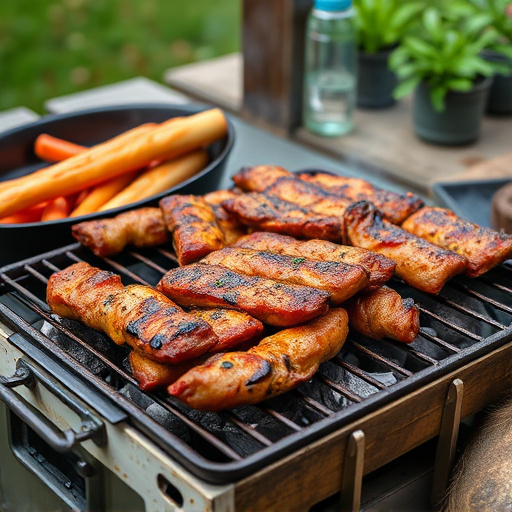
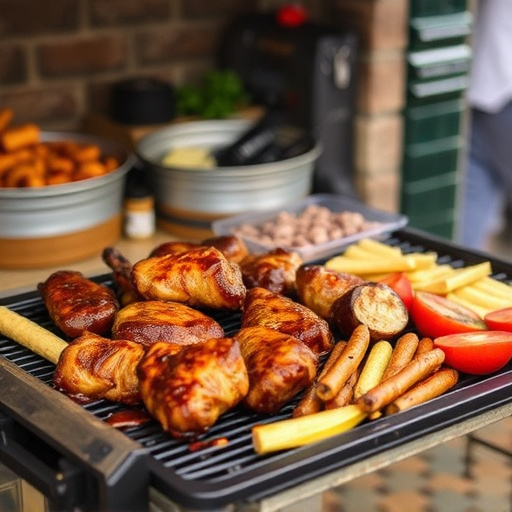
Selecting lean cuts of beef or chicken, marinating in a balanced blend, and precise drying create a superior BBQ jerky recipe. Use soy sauce, vinegar, brown sugar, garlic, onion powder, paprika, chili powder, black peppercorns, mustard seeds, salt, and paper towels. Dry at 140-200°F (60-93°C) for 4-8 hours in an oven or dehydrator. Store airtight at cool temperatures for up to 6 months. Follow food safety guidelines for consistent quality.
“Transform your backyard cooking with our easy-to-follow guide to making mouthwatering BBQ jerky at home. Discover the secrets to selecting the best meat, from choosing the perfect cuts to mastering the art of preparation and cutting. Learn about crafting a flavorful marinade and spice blend that’ll tantalize your taste buds. We’ll walk you through the drying process, whether using an oven or dehydrator, and provide tips for storing and serving your delicious DIY BBQ jerky recipe.”
- Selecting the Best Meat for Jerky
- Preparing and Cutting Your Meat
- Marinade and Spice Blend Secrets
- Drying Process: Techniques and Timings
- Cooking Methods: Oven or Dehydrator?
- Tips for Storing and Serving BBQ Jerky
- Common Mistakes to Avoid
Selecting the Best Meat for Jerky
When it comes to making BBQ jerky, selecting the right meat is half the battle won. The key is to opt for lean cuts with minimal fat content, as excess fat can render your jerky tough and less appetizing. A popular choice among jerky enthusiasts is beef sirloin or round steak due to its tenderness and rich flavor. Chicken breast is another excellent option, offering a lighter alternative that still packs a punch of protein.
For a truly mouthwatering BBQ jerky recipe, consider marinating your chosen meat in a mixture of your favorite BBQ sauce, garlic, onion powder, salt, and pepper before drying. This step enhances the overall taste and ensures each piece of jerky is infused with flavor. Remember, the quality of your ingredients sets the stage for a delicious end product, so choose wisely!
Preparing and Cutting Your Meat

Preparing and cutting your meat is a crucial step in making the perfect BBQ jerky. Start by selecting high-quality, lean cuts of beef or pork. Trim any visible fat or silver skin to ensure your jerky turns out lean and tender. Cut your meat into thin, even strips; this guarantees even cooking and helps achieve that desired crispy texture.
For best results, use a sharp knife or meat slicer to cut against the grain of the meat. This technique ensures each strip is as thin as possible, allowing for quicker preparation and a more uniform jerky. Once cut, pat your meat strips dry with paper towels; this step is essential in ensuring your BBQ jerky recipe turns out crispy and not soggy.
Marinade and Spice Blend Secrets
Creating the perfect BBQ jerky starts with a secret weapon: the marinade and spice blend. For an irresistible BBQ jerky recipe, balance is key. A good marinade should coat the meat evenly, infusing it with flavor while tenderizing the fibers for that perfectly chewy texture. Experiment with a base of soy sauce or vinegar, both of which act as natural tenderizers. Add a touch of brown sugar to enhance sweetness and caramelization, and incorporate garlic and onion powders for an aromatic profile that elevates your BBQ jerky recipe from ordinary to exceptional.
The spice blend is where you can get creative. Paprika lends a rich, smoky flavor, while chili powder adds a kick. Don’t forget black peppercorns for depth and ground mustard seeds for that extra zing. A pinch of salt not only enhances flavors but also helps draw out moisture. Mix these ingredients together to create a well-rounded spice blend tailored to your taste preferences. Remember, the beauty of making BBQ jerky at home is the ability to customize and refine the recipe to suit your palate.
Drying Process: Techniques and Timings
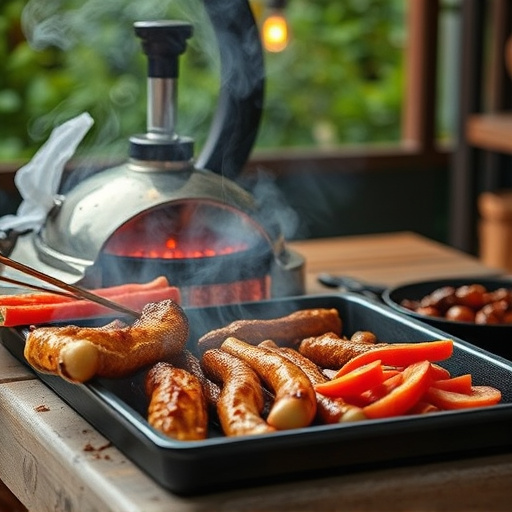
The drying process is a crucial step in jerky preparation, as it helps to preserve the meat and intensify its flavors. There are several techniques to achieve this, each with its own timing and considerations. One popular method involves using a dehydrator, which circulates warm air to gently dry the meat slices evenly. This approach ensures consistent texture and prevents overcooking, preserving the jerky’s chewy consistency. Typically, dehydrating BBQ jerky at a low temperature (around 140-160°F or 60-70°C) for 4-6 hours is ideal, allowing for gradual moisture loss without burning or altering the meat’s natural taste.
Alternatively, you can use your oven on the lowest setting with the door slightly ajar to create a passive drying environment. This method may require more careful monitoring as temperatures can fluctuate, but it offers a cost-effective solution. Set the oven between 150-200°F (65-93°C) and dry for approximately 4-8 hours, depending on your oven’s performance and the thickness of your jerky slices. Regularly check the meat during this process to ensure it doesn’t become too dry or overcooked, which can lead to a tough texture.
Cooking Methods: Oven or Dehydrator?

When it comes to making mouthwatering BBQ jerky at home, one of the key decisions is choosing between using an oven or a dehydrator. Both methods have their advantages and will yield delicious results if executed correctly. For many, the traditional approach is to use an oven, as it’s readily available and doesn’t require additional equipment. You can simply place your seasoned meat in an oven at a low temperature for several hours until it becomes jerky. This method allows for precise control over cooking time, ensuring your jerky doesn’t burn.
However, dehydrators offer a more efficient and consistent way to prepare jerky, especially if you’re looking for that perfect chewy texture. Dehydrators circulate warm air, slowly removing moisture from the meat, resulting in a longer-lasting product with less chance of spoilage. This method is particularly useful for larger batches or when aiming for an extra crispy texture. So, whether it’s convenience or quality, both oven and dehydrator methods open doors to crafting your very own scrumptious BBQ jerky recipe.
Tips for Storing and Serving BBQ Jerky
Storing Your BBQ Jerky Properly
Once your delicious homemade BBQ jerky is ready, it’s important to store it correctly to maintain its freshness and quality. The key to long-lasting jerky is keeping it dry and protected from moisture. Use airtight containers or vacuum-sealed bags to prevent exposure to air, which can cause the meat to dry out or spoil faster. Store your jerky in a cool, dark place like a pantry or fridge. The ideal temperature range is between 30°F (1.7°C) and 40°F (4.4°C), ensuring it stays crispy and flavorful for several weeks.
When serving BBQ jerky, consider its texture and how you want to enjoy it. For a classic experience, pair it with your favorite beverage—beer or a rich, creamy drink work well. You can also experiment by offering different serving styles; for instance, serve small portions as a snack, or create gourmet dishes using jerky as a main ingredient. Its versatility allows for endless possibilities, so get creative and enjoy the fruits of your labor!
Common Mistakes to Avoid
When making BBQ jerky at home, it’s easy to get caught up in the excitement and make some common mistakes that can ruin your final product. One of the most frequent errors is overlooking the importance of food safety. Always ensure your hands and work surfaces are clean, and use a food thermometer to check internal temperatures—a crucial step often skipped by amateur jerky makers. Overcooking is another blunder; it leads to tough, chewy meat. Aim for the recommended cooking times and temperatures specified in your BBQ jerky recipe to achieve tender, flavorful results.
Another pitfall is not properly seasoning the meat. A balanced blend of spices and sauces is key to delicious BBQ jerky. Avoid over-saturating the meat with marinade or sauce, as this can result in a glumpy, unevenly coated final product. Letting the seasoned meat rest for the recommended time allows the flavors to penetrate deeply without oversoaking it. Remember, patience is a virtue when it comes to jerky making; these simple steps will ensure your DIY BBQ jerky recipe turns out perfectly every time.